Images
Note
Only pixel graphics can be displayed directly in the additional information. Vector graphics can only be included via hyperlink.
You need to have the content editor open. To access the editor for a planning activity, go to the activity's detailed view and click Quick Actions > Edit general element info. For a timeline, open the Timeline Context Menu and click Details. The Edit Timeline dialog box opens.
-
In the editor, position your cursor where you want to insert the pixel graphic.
-
Click
 .
. -
The Image properties dialog box appears.
-
Click Browse Server.
-
If you do not select a pixel graphic from the existing list of attachments, upload a new file: Add a file by drag and drop in the lower left area.
-
In the attachment list, click the button next to the pixel graphic that you want to include.
-
Edit the image properties. Refer to the following sections for detailed information when doing so.
-
Click .
Another dialog box is displayed:
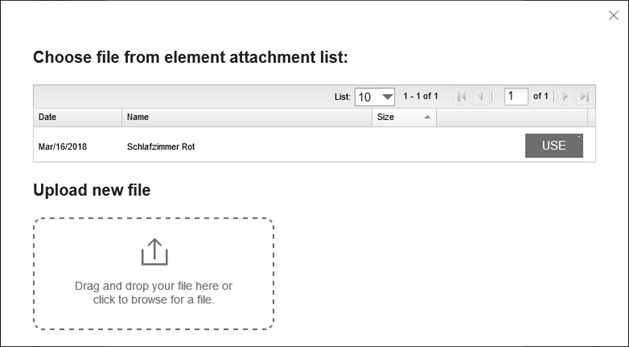
The top list shows the activity's attachments. Note that the files can be of different formats, including documents, vector graphics, etc.
The image is uploaded and added to the attachment list.
The image is included in the preview in the Image properties dialog box.
The image has been added in the editor.
Note that the graphic will only be displayed correctly if it is a pixel graphic. If you have accidentally selected a file with a different format in the attachment list, a red icon with a white X will appear in the Image properties dialog box. If you close the dialog box and the editor is displayed, the icon  is displayed instead of the image. In this case, select another file.
You can access the following properties in the Image properties dialog box:
|
Property |
Purpose |
|---|---|
|
This field should be a URL in the format "(http(s)://)www.example.com" |
Enter the URL to the pixel graphic or click . If you have selected a pixel graphic, the URL will be inserted automatically. |
|
Alternative text |
Optionally, you can enter an alternative text. |
|
Width |
Enter the width in pixels for the display in the additional information. Note: Width and height change proportionally to each other by default. If you want to enter a non-proportional ratio, click the lock icon. |
|
Height |
Enter the height in pixels for the display in the additional information. Note: Width and height change proportionally to each other by default. If you want to enter a non-proportional ratio, click the lock icon. |
|
Frames |
Enter the width of the border in pixels. |
|
Horizontal spacing |
Enter the horizontal distance of the image from the surrounding elements in pixels. |
|
Vertical spacing |
Enter the vertical distance of the image from the surrounding elements in pixels. |
|
Orientation |
Choose whether the image is left-aligned or right-aligned in the additional information. |
|
Inner cell spacing |
Enter the distance of the text to the cell boundary in pixels. |
|
Heading |
Enter a heading for the table. |
|
Content overview |
Enter a content overview for the table. |
For a description of the adjustable properties, see the documentation for CKEditor.